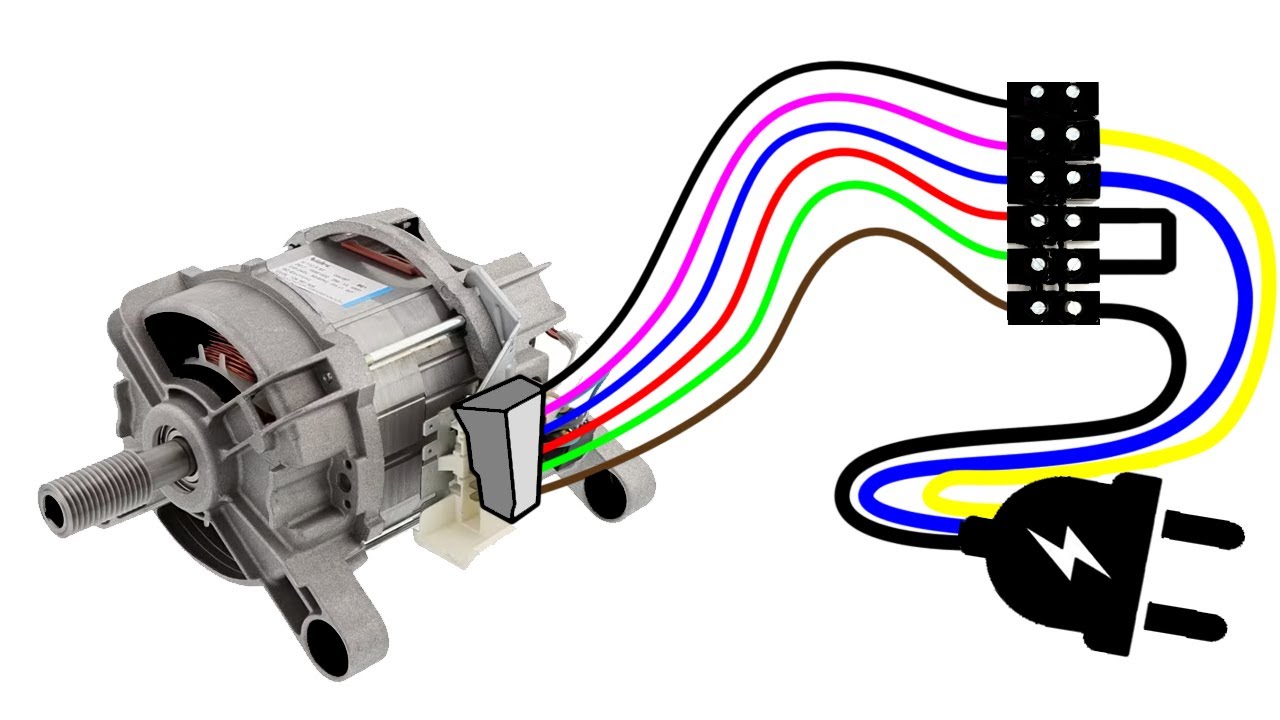
Don't THROW away your old 6 WIRE WASHER MOTOR without seeing it WORK..
Don't THROW AWAY your old 6 WIRE WASHER MOTOR without seeing it WORK. In this video of easy electronic projects we are going to see how we can make a washing machine motor work outside the appliance, in this case we have a 6-wire washing machine motor, the first thing we are going to do is identify each cable and where it comes from , after there we will see with the homemade LED continuity tester that we made in the channel the pins that give us continuity, in this case 2 pins correspond to the tachometer that is controlled by the electronic card, 2 pins correspond to the stator and the other 2 pins correspond to the brushes, to make the connections we are going to use a recycled cable with grounding that can be the same cable as the washing machine, and a couple more cables for the connections, we are also going to make a bridge to insert the brushes with the stator, at the end of the video we are going to place a DIMMER to control the speed of the motor and we are going to insert it in the installation


No comments:
Post a Comment