What is an electronic brick? An electronic brick is an electronic module which can be assembled like Lego bricks simply by plugging in and pulling out. Compared to traditional universal boards and circuit modules assembled with various electronic components, electronic brick has standardized interfaces, plug and play, simplifying construction of prototype circuit on one’s own. There are many types of electronic bricks, and we provide more than twenty types with different functions including buttons, sensors, Bluetooth modules, etc, whose functions cover from sensor to motor drive, from Ethernet to wireless communication via Bluetooth, and so on. We will continue to add more types to meet the various needs of different projects.
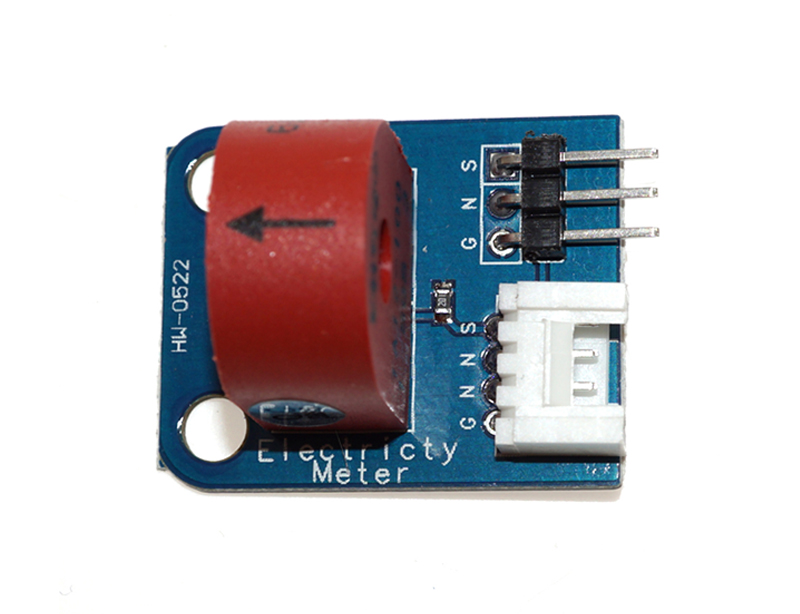
Electronic brick of electricity sensor is based on TA12-100 current transformer, which can transform AC signals of large current into small amplitude signals. The maximum current that can be detected can reach 5A, and the present current signal can be read via analog I/O port.
Here is a quick introduction to using the Keyes TA12-200 based current sensor module. Hopefully it will provide you with the confidence to start monitoring exactly how much power those tea drinkers are actually using.
This example will demonstrate the use of an Arduino UNO in monitoring an analog pin state as the current sensor monitors an AC live wire.
The code consists of a definition, setup and loop. First the A0 pin is assigned followed by a variable to store the value read. This allows easier use later in your program. A setup informs the system that the pin is an input is an input and then launches the serial connection. Next we enter the loop, where the value on the pin is read and stored in the variable declared earlier. Following that we send it to the serial monitor so that the value can be read on the screen.
Load the code below into the Arduino IDE and upload it to your board.
With the board loaded with the program and all the connections made the serial monitor will produce an output like the one seen below. In this instance, the live wire of a kettle is passed through the sensor, then I began turning it on and off. You will notice outputs reaches its maximum when it is turned on.
What is an electronic brick? An electronic brick is an electronic module which can be assembled like Lego bricks simply by plugging in and pulling out. Compared to traditional universal boards and circuit modules assembled with various electronic components, electronic brick has standardized interfaces, plug and play, simplifying construction of prototype circuit on one’s own. There are many types of electronic bricks, and we provide more than twenty types with different functions including buttons, sensors, Bluetooth modules, etc, whose functions cover from sensor to motor drive, from Ethernet to wireless communication via Bluetooth, and so on. We will continue to add more types to meet the various needs of different projects.
Electronic brick of electricity sensor is based on TA12-100 current transformer, which can transform AC signals of large current into small amplitude signals. The maximum current that can be detected can reach 5A, and the present current signal can be read via analog I/O port.
Here is a quick introduction to using the Keyes TA12-200 based current sensor module. Hopefully it will provide you with the confidence to start monitoring exactly how much power those tea drinkers are actually using.
This example will demonstrate the use of an Arduino UNO in monitoring an analog pin state as the current sensor monitors an AC live wire.
The code consists of a definition, setup and loop. First the A0 pin is assigned followed by a variable to store the value read. This allows easier use later in your program. A setup informs the system that the pin is an input is an input and then launches the serial connection. Next we enter the loop, where the value on the pin is read and stored in the variable declared earlier. Following that we send it to the serial monitor so that the value can be read on the screen.
Load the code below into the Arduino IDE and upload it to your board.
With the board loaded with the program and all the connections made the serial monitor will produce an output like the one seen below. In this instance, the live wire of a kettle is passed through the sensor, then I began turning it on and off. You will notice outputs reaches its maximum when it is turned on.


No comments:
Post a Comment